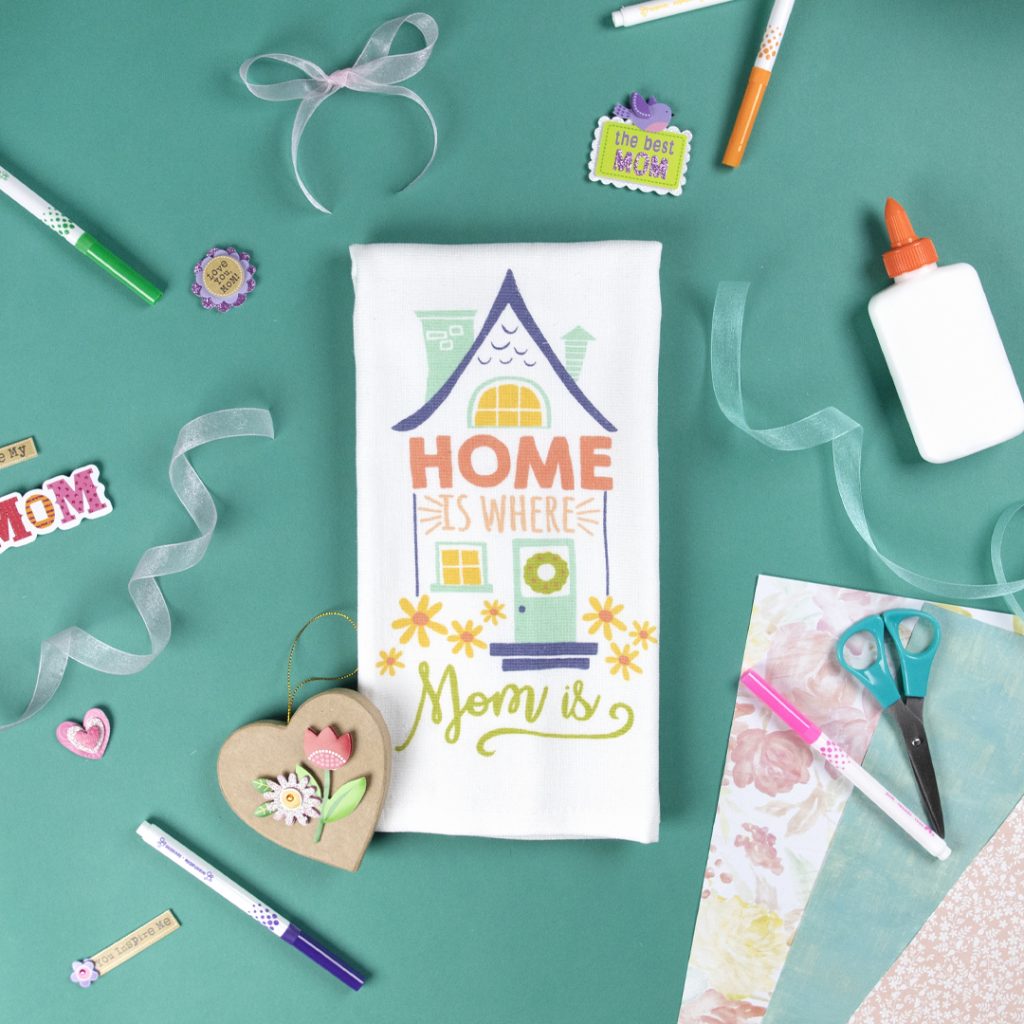
(Shown here: RITZ® Home is Where Mom Printed Dual Kitchen Towel)
Mother’s Day is coming soon and what better way to let mom know that she is loved and appreciated than by giving her a homemade gift! She will love getting something that her kids put time and love into and it will mean so much more than something store-bought. Moms do so much and should be celebrated!
The following crafts are relatively easy to do and require few craft supplies. They are great to do with your kids so that they get to enjoy doing a fun activity that can also double as their Mother’s Day gift to mom.
Fingerprint Heart Tree
Supplies:
- 2 sheets of white paper
- Ink pads (you can also use finger paints)
- Black marker
- Scissors
- Pencil (optional)
Instructions:
- First, make a heart stencil by folding a white sheet of paper in half and drawing a half heart shape. Then you can easily cut the heart out and unfold it.
- Place that sheet of paper with the heart outline on top of a regular sheet of white paper.
- Draw a tree truck with branches (no leaves) with a black marker.
- Dab your fingers (using thumbs and fingertips to get different shapes) onto the ink pads and stamp them all over the heart shape to make the “leaves”.
- Remove the sheet of paper with the heart outline and you’ll have your finished tree!
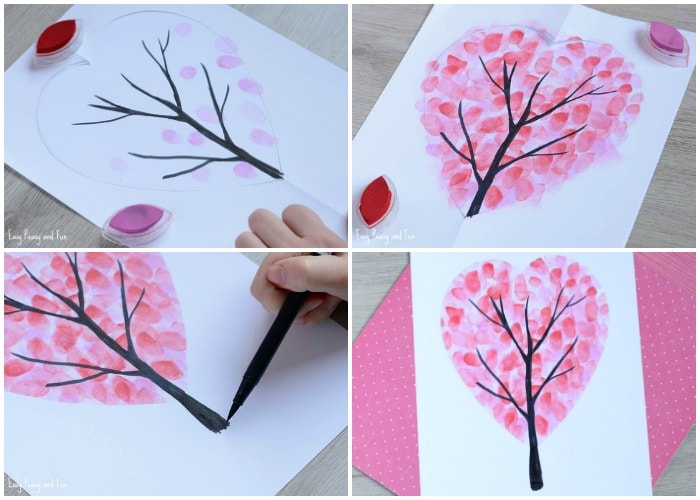
Source: https://www.easypeasyandfun.com/valentines-day-heart-fingerprint-tree/
“Mom” Painting
Supplies:
- Plain piece of paper or cardstock
- Scissors
- Tape
- Red, yellow and blue paint
- Paint brush
- 3 containers or paper plates for mixing colors
- “Mom” printed cut-out (or feel free to make your own): https://madmimi.com/signups/d6849174494648e1855847d75151d1db/join
Instructions:
- Cut out the word “Mom” before you first begin.
- Tape your “Mom” cut-out on your plain piece of paper and lightly tape it to the paper (since you’ll want it to come off later).
- Help your child put the 3 paint colors into the containers or on the paper plates. They can mix the colors to create more colors. Ex: Red + yellow = orange.
- Then have them have fun painting their paper.
- Lift up the “Mom” paper to see the surprise result – a work of art!
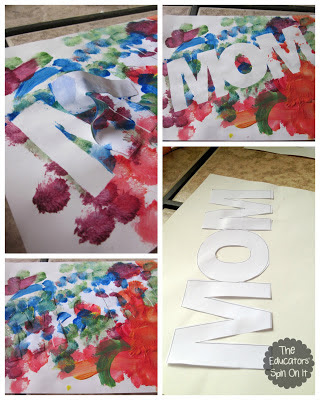
Source: https://theeducatorsspinonit.com/easy-mothers-day-craft/
Mother’s Day Card
Supplies:
- Regular size and mini size cupcake liners
- Buttons
- 5-inch by 7-inch blank cards
- Green crayon
- Tacky glue
- Glue stick
- Happy Mother’s Day stamp (or feel free to write it out yourself)
- Stamp pad (any color that will show up on your blank card)
Instructions:
- Start by stamping your “Happy Mother’s Day” stamp on the front of your card or writing it out yourself in one of the bottom corners.
- Glue a regular size cupcake liner onto the card with your glue stick. (Tip: leave the edges unglued so that they pop off the card a little bit.)
- Take another regular size cupcake liner, told it in half, and cut it so that it is a little bit smaller. Then glue it down on top of the other cupcake liner.
- Layer your flower again by gluing a mini cupcake liner on top of the other 2.
- Glue a few brightly colored buttons into the center of your flower.
- Finish your card by drawing a stem on your flower with your green crayon.
- Let your card fully dry.
- Don’t forget to add in a special message and/or photo to the inside of your card to add the final touch!
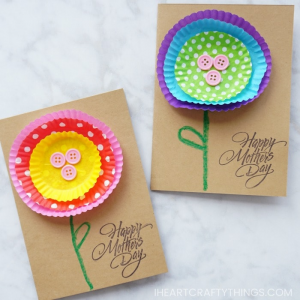
Source: https://iheartcraftythings.com/simple-kid-made-mothers-day-card.html
We hope the special mom or grandmother in your life loves receiving these special Mother’s Day gifts just as much as you and your kids loved making them!